Get started
Learn how to manage your Zeytal account, create projects, and auto-generate code from Figma.
Create a Zeytal account
When you first sign up for Zeytal, you’ll create an account by logging in with Figma.
This account will help you manage your Zeytal organizations, projects, and source files.
Before getting access to your user dashboard, you will have to follow an onboarding phase designed to help you create your first organization and project without friction.
Those seeking to join an existing organization can choose the “team member” path and skip the organization and project creation process altogether.
Note: If you skip the organization and project creation process by choosing the “team member” path, you won’t get your 2-week free trial.
Create my account
First organization
After the onboarding process, you either:
- are the administrator of your own organization
- or a member of a preexisting organization
Either way, you’ll see your organizations list. You can either create a new organization or enter the one you’re already a part of.
In there, you’ll be able to edit and set up stuff.
Thanks to a tab menu, you’ll access:
- Overview: View including your projects list.
- Members: View enabling you to find your admin’s info and manage org members.
- Settings: View containing all your org settings. You’ll find features like your org id, org renaming, org admin transfer, org deletion, etc.
What’s really interesting is your first project, though.
First project
From the org overview tab, you can see your projects list; in it, your first project is marked as “free trial.”
By clicking on this project, you access your project’s dashboard.
Here, you’ll find the project tab menu allowing you to access:
- Overview: View including your project secret key and alerts related to your project’s current state.
- Assets: View enabling you to manage your Figma assets source files.
- Styles: View enabling you to manage your Figma styles source files.
- Variables: View enabling you to manage your Figma variables extractions.
- Settings: View containing all your project settings. You’ll find features like your project secret key, project renaming, Figma personal access token, project subscription plan, project transfer, project deletion, etc.
List your files
Now that you’re familiar with your dashboard, we’ll need to get down to business and list your Figma files to auto-generate code from them.
We’ll need to:
- Follow the same listing process in both the assets and styles tabs
- Follow a different process (using the Zeytal Figma Plugin) to freely extract your Figma variables to your variables tab
Assets tab
Open the assets tab and add the Figma files from which you want to get your SVGs.
Like magic, Zeytal CLI will be able to fetch and optimize all the Figma elements marked with an export setting set to SVG on them.
The files listed in the assets tab will be used only for asset generation.
Styles tab
Open the styles tab and add the Figma files from which you want to get your Figma styles.
Zeytal CLI will be able to fetch all the styles implemented in your Figma files.
We stress the word implemented here because Figma’s REST API is what it is; it’s simply impossible to fetch styles that are not implemented in your designs.
To ensure all your styles are retrieved and transformed by the CLI, save them AND use them in your files.
The files listed in the styles tab will be used for style generation only.
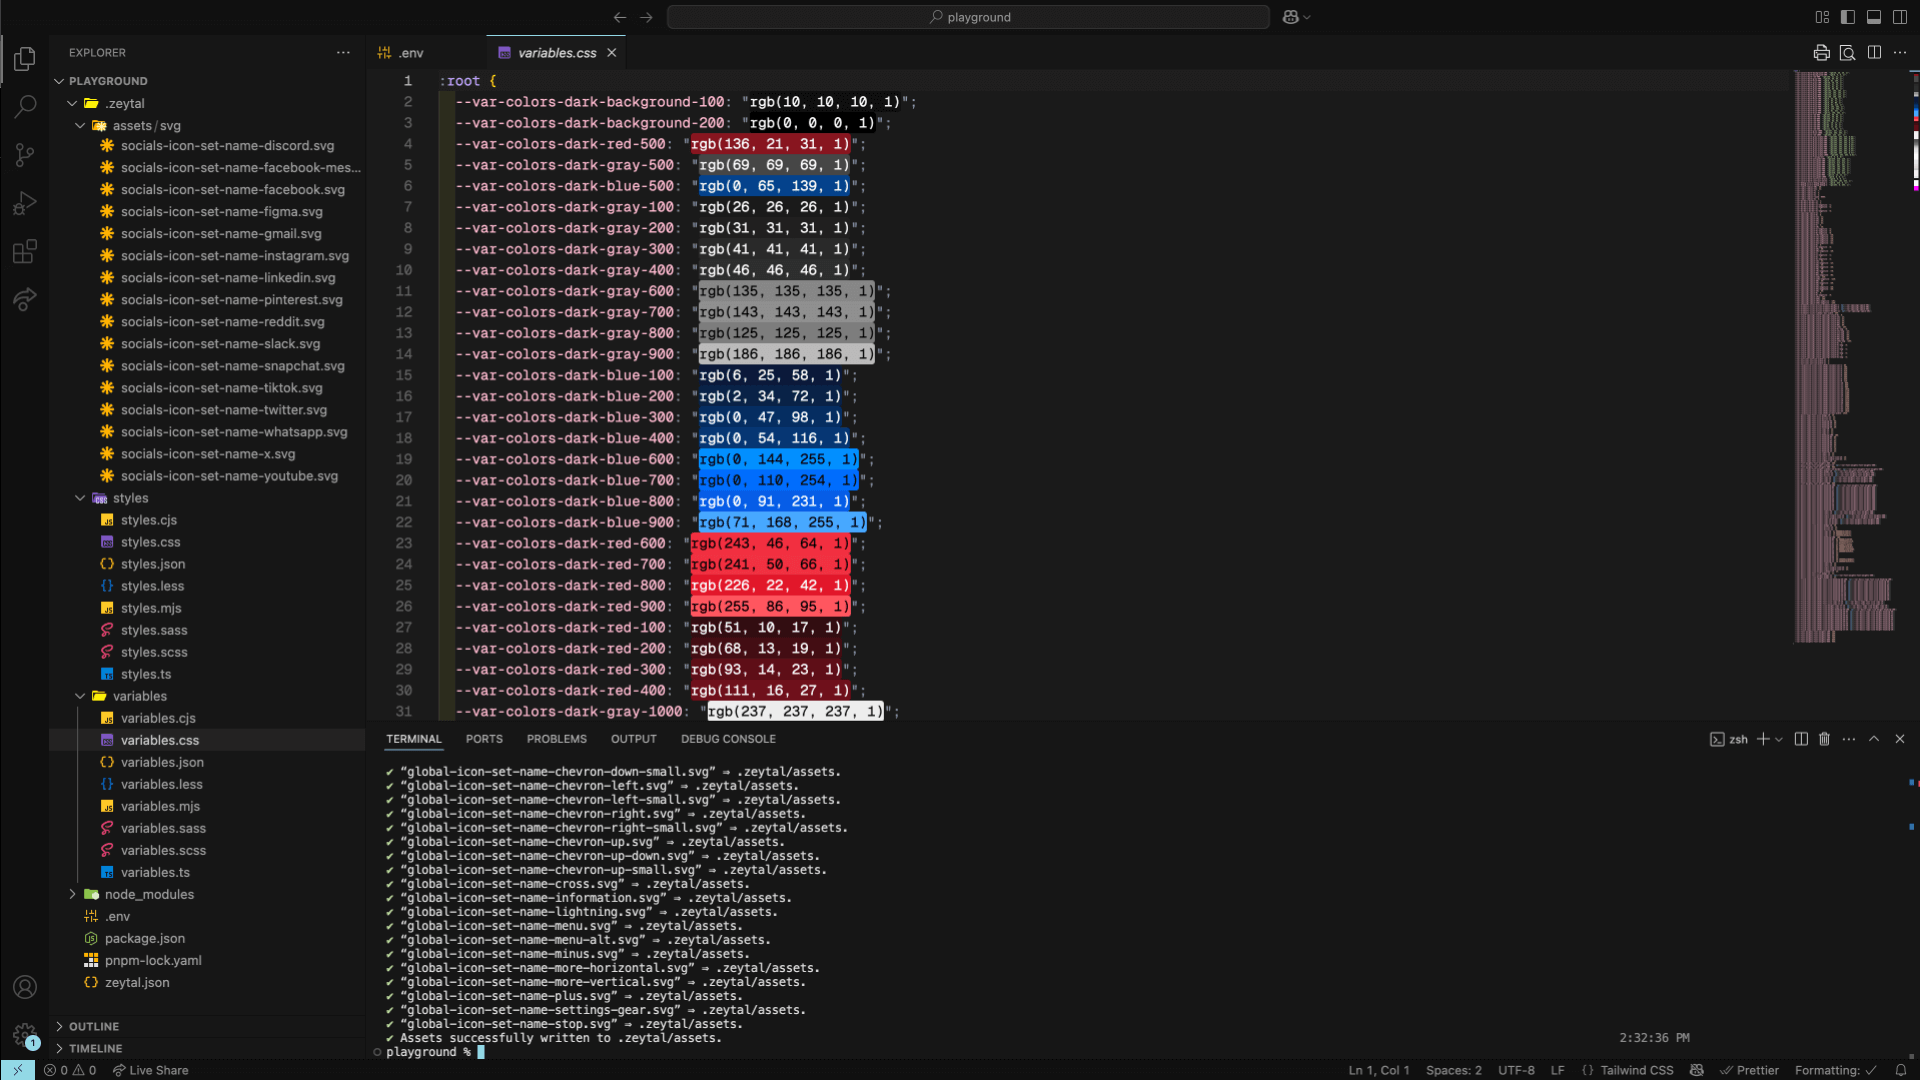
Variables tab
Here, you will see a list of all your Figma variable extractions.
Each extraction line displays the Figma file name, the number of Figma variable collections, and the time since the file’s last extraction.
You can revoke an extraction by clicking the cross button on a line. This is useful for forgetting about a deprecated variable source file.
When you want to extract fresh Figma variable data from your Figma files, you must run the Zeytal Figma Plugin in each of your Figma files containing the variables you want to use.
This step is mandatory since the Figma REST API only allows variable collections fetching for people on their Enterprise plan (Figma ultra premium subscription plan).
Tiny Design System Figma file
To help you test the CLI efficiently for your first time, we created a “tiny design system” Figma file from Afterlife DS, the open-source complete design system file we use to make Zeytal and other tools.
You can get it for free on Figma Community below:
Open in Figma Community
Afterlife DS file
For those who want to use a shortcut or simply steal all our secrets, you’ll find our open-source design system file here below.
It is free, open-sourced, accessible and responsive by design.
Enjoy!
Go to Afterlife DS
Auto-generate code
First, we need to install Zeytal CLI package:
terminal
pnpm i -D zeytalThen, we need to copy our project secret token from our dashboard and load it as an environment variable.
Zeytal has built-in support for loading environment variables from your .env file. So, we can paste it into our .env file like this:
.env
ZEYTAL_PROJECT_TOKEN=ABCDEFGHIJKlmnopqrstuvwxyz123456789Note: The env variable name is essential there. If misspelled, Zeytal won’t be able to retrieve your project’s data.
Once this is done, we can simply type in any Zeytal CLI command in a terminal and watch the CLI package do its job:
Simplest command example:
terminal
pnpm zeytalAfter the command has finished its task, you’ll see a .zeytal folder at the root of your project.
You’ll find your optimized SVGs, formatted style files, and formatted variable files inside it.
Zeytal CLI configuration
The last step in your journey is to use and master the CLI to extract the right stuff from Figma and generate it directly into your dev environment.
At the same level as our .env file, we can create a config file to tweak the CLI default settings so the code you generate fits 100% with the front-end tools you use.
We can create multiple types of config files like a zeytal.json or a .zeytalrc, for example.
We can also tweak many different settings. It goes from the Figma files version we want to use (live, saved, or published) to the color format you want to use for color variables (e.g. hex, rgba, etc.).
All available settings are documented in the CLI config files doc page.